Note: This article is a re-write of a previous article, showing how to build a real-time system monitoring application using SignalR and WCF. This update shows how to build the same thing, but with the release version of SignalR and using WebAPI instead of WCF.
Application building time! This article is designed to give you, the reader, some grounding in a few different technologies and help you build a working application which may or may not be actually useful. Nonetheless, it should be fun to build and at the end you will hopefully see some nice web wizardry to keep you entertained. Beware – this is a lengthy one, but you can fork/download the code from Github.
Here’s what we will build:
- An MVC web application, exposing a Web API endpoint to clients
- A console application to securely send processor and memory information to the service
- A web page to show these system stats in real time using SignalR and KnockoutJS
These are the technologies we are going to use, all of which are installed through Nuget:
- SignalR 2.1.2
- KnockoutJS 3.1
- Asp.Net MVC 5
- WebApi 2
- Owin, for SignalR hosting
And this is what will happen: the console application will run on the host PC and post system resource usage as JSON to the Web API endpoint which is running on the web server. The endpoint will then send this information straight to the SignalR hub, which will then broadcast the information to all clients, who will display this information on the page.
In this article, I am using Visual Studio 2013 (with Update 3 applied) with an Asp.Net MVC 5 web project.
Before we get started, you should familiarise yourself just a little with SignalR and KnockoutJS as I’m not going to go into the technical concepts behind them, but merely show you how to use them. Both sites have excellent tutorials here and here to get you started. Also, I assume you know your way around Asp.Net MVC.
From now on, I will host any code that accompanies a tutorial or article that is worth downloading, on Github. You can download/fork/play with the code for this article to your heart’s content!
A word on hosting
This app is set up to use a local IIS server as the hosting platform, mainly because it makes it really easy to connect to it from another machine. IIS Express on the other hand, only accepts requests from the local machine by default. There is a way to enable connections from another machine, but I couldn’t get it to work. If you feel like it, there seems to be a few good answers on StackOverflow and a blog post from the IIS team which may get you started.
So, the app is hosted on IIS as https://localhost:44300, and you might want to set your platform up the same way I have it here if you want to follow along with the blog post. I installed the IIS Express SSL certificate into the site to demonstrate how SSL could be used, and it’s very easy. For the purposes of demoing the app, you can of course not use SSL. The only thing that matters is that the client app connects to the same URL that the web app is being hosted on, which in this blog post is port 44300. Remember to allow it through your firewall if you intend to try it out with another machine on the network.
The Web Application
We’ll start by creating the web application, as it hosts the WCF service which we require in order to complete the console application in the next section. Start by creating a new MVC application – I used the “Empty” template for a MVC 5 Web Application, but really the version doesn’t matter too much; we just need a web host.
First, we shall install SignalR. This is very easily done using Nuget, and you can either install this from the Package Manager Console, or through the GUI. The package name is simply called SignalR:
$ Install-Package Microsoft.AspNet.SignalR
This will install a number of scripts into the /Scripts folder and also add references to a couple of SignalR managed libraries. In order to boot SignalR and get all the moving parts working, we use a Startup class which comes from Microsoft’s implementation of the OWIN standard. OWIN itself is outside the scope of this article, but if you haven’t come across it before, you need to check out Asp.Net vNext and all the associated technologies that will be emerging over the next few months – essential reading if you’re taking your MVC career into the future. You can read all about it on the Asp.Net vNext homepage.
Create a class in the root of the project and add the following contents. This class has one single job – to boot SignalR:
using Microsoft.Owin;
using Owin;

[assembly: OwinStartup(typeof(WcfCpuApp.Startup))]
namespace WcfCpuApp {
  public class Startup {
    public void Configuration(IAppBuilder app) {
      app.MapSignalR();
    }
  }
}
This just ensures that SignalR is started correctly and is set up to handle incoming requests, delegating to hubs, etc. Speaking of Hubs, we need to create one to manage our connections and pass messages around. Create a new folder within the web project called “Hubs” and add a new class called “CpuInfo”. This class will inherit from Microsoft.AspNet.SignalR.Hub, and will contain a single method for sending CPU data:
using Microsoft.AspNet.SignalR;

namespace WcfCpuApp.Hubs {
  public class CpuInfo : Hub {
    public void SendCpuInfo(string machineName, double processor, int memUsage, int totalMemory) {
      this.Clients.All.cpuInfoMessage(machineName, processor, memUsage, totalMemory);
    }
  }
}
Take note of the call to this.Clients.All.cpuInfoMessage – this is the call that we need to have a handler for in Javascript (as we will see shortly) and we need to give it the same name. It’s dynamically typed, so you won’t get any intellisense but you’ll need to make sure that the method names match up when you come to write the Javascript code.
The next thing to do is set up a page where we can monitor this data. I am going to start this page, then move to the console client application, and then come back to this page to finish it off.
Right-click on the “Controllers” folder and add a new controller called “HomeController”:

Once it has been created, open HomeController.cs, right-click on the Index() action and add a new view. The default settings here are fine:

To get the UI working, we need a few things:
- Include script references for jQuery, Knockout, SignalR and the SignalR Hub Proxy in a layout file
- Write a little bit of script to open the connection to the hub and listen for messages
- Display data from any connected machine in a table
First, the actual view page
 @{
  ViewBag.Title = "Index";
  Layout = "~/Views/Shared/_Layout.cshtml";
}

<div id="computerInfo">
  <h2>Real-time System Resource Monitor</h2>
  <h5 data-bind="visible: connected">Connected to message hub</h5>

  <table class="table table-striped" border="0">
    <tbody>
      <tr>
        <th>Machine</th>
        <th>CPU %</th>
        <th>Memory Available (Mb)</th>
        <th>Total Memory (Mb)</th>
        <th>Mem Available %</th>
      </tr>

      <!-- ko foreach: machines -->
        <tr data-bind="css: { highCpu: cpu() > 90 }">
          <td data-bind="text: machineName"></td>
          <td data-bind="text: cpu"></td>
          <td data-bind="text: memUsage"></td>
          <td data-bind="text: memTotal"></td>
          <td data-bind="text: memPercent"></td>
        </tr>
      <!-- /ko -->
    </tbody>
  </table>
</div>
@section Scripts { <script src="~/Scripts/index.js"></script> }
On this page, we’re setting up a table that will driven by a Knockout JS view model, which in turn is updated by the data being received from our SignalR hub. Next, inside the /Views/Shared folder (create it if it doesn’t exist) we need a layout file, called “_Layout.cshtml”. Here’s where we include a few scripts that are core to getting all this to work together – the Signal library, our generated hubs script (which is generated implicitly for us by SignalR) and the Knockout library:
 @{
  Layout = null;
}

<meta name="viewport" content="width=device-width" />

<title>Real-time Resource Monitor</title>
<link href="~/Content/bootstrap.min.css" type="text/css" rel="stylesheet" />
<script src="/Scripts/jquery-2.1.1.js"></script>
<script src="/Scripts/jquery.signalR-2.1.2.min.js"></script>
<script src="/signalr/hubs"></script>
<script src="/Scripts/knockout-3.2.0.js"></script>
<script src="/Scripts/knockout.mapping-latest.js"></script>

@RenderSection("Scripts", false)

<div class="container"> @RenderBody() </div>
Finally, the script which glues it all together is inside a separate Javascript file. Create a file in /Scripts called “index.js” and populate it with the following:
 $(function() {
    // The view model that is bound to our view
    var ViewModel = function() {
        var self = this; // Whether we're connected or not
        self.connected = ko.observable(false); // Collection of machines that are connected
        self.machines = ko.observableArray();
    }; // Instantiate the viewmodel..

    var vm = new ViewModel(); // .. and bind it to the view
    ko.applyBindings(vm, $("#computerInfo")[0]); // Get a reference to our hub

    var hub = $.connection.cpuInfo; // Add a handler to receive updates from the server

    hub.client.cpuInfoMessage = function(machineName, cpu, memUsage, memTotal) {
        var machine = {
            machineName: machineName,
            cpu: cpu.toFixed(0),
            memUsage: (memUsage / 1024).toFixed(2),
            memTotal: (memTotal / 1024).toFixed(2),
            memPercent: ((memUsage / memTotal) * 100).toFixed(1) + "%"
        };

        var machineModel = ko.mapping.fromJS(machine); // Check if we already have it:

        var match = ko.utils.arrayFirst(vm.machines(), function(item) {
            return item.machineName() == machineName;
        });

        if (!match) vm.machines.push(machineModel);
        else {
            var index = vm.machines.indexOf(match);
            vm.machines.replace(vm.machines()[index], machineModel);
        }
    }; // Start the connection

    $.connection.hub.start().done(function() {
        vm.connected(true);
    });
});
The important part here is that we’re essentially adding a handler for the cpuInfoMessage method that we have already declared in our Hub class on the server-side. Remember that? This is where that information ultimately ends up. When a message is sent down that SignalR pipe, this method in our script picks it up, transforms the data into a Knockout viewmodel and thus updates the view. If you weren’t using Knockout to update your view, this is where you would use jQuery or any other method to take the computer data and reflect the changes to the user by updating the Html.
So, how do we start getting data into the system?
Creating the Web Api endpoint
We’re going to create an Api controller that will allow us to accept incoming requests in JSON format that contain the resource values from remote machines. To start, add a new Web Api controller to the project called “CpuInfoController” and put it in the /Api folder:
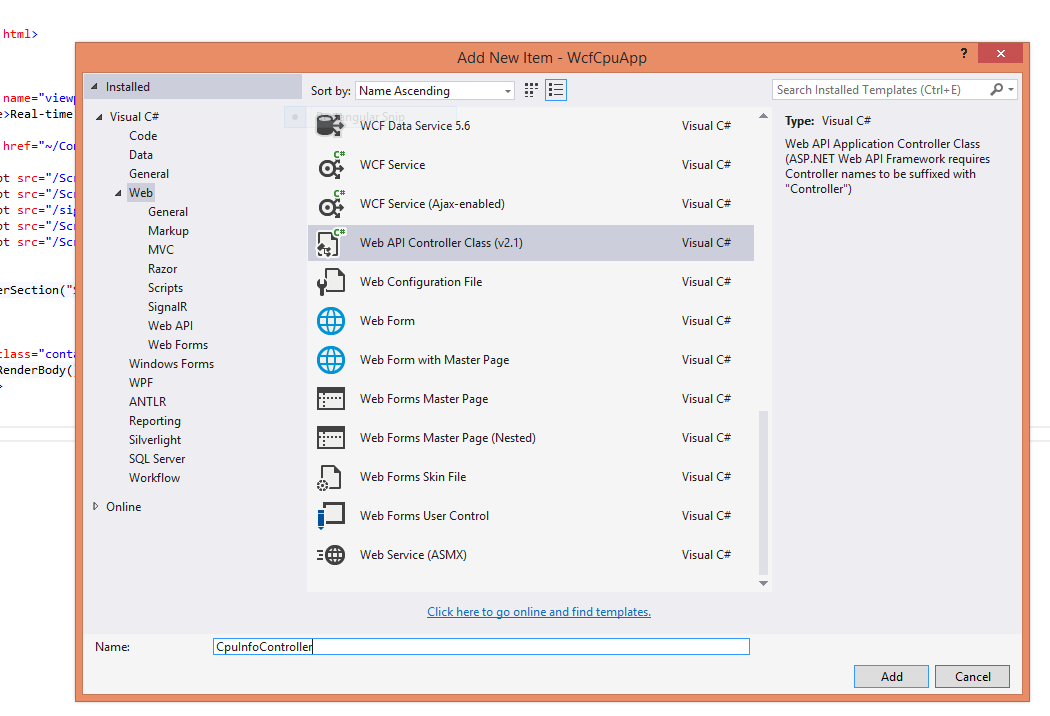
This should be populated with the following contents, which isn’t a whole lot to be honest with you. We simply define an Api controller that accepts a packet of information from a client as a POST request, then passes the data through to our SignalR hub:
using System.Web.Http;
using Microsoft.AspNet.SignalR;
using WcfCpuApp.Hubs;
using WcfCpuApp.Models

namespace WcfCpuApp.Api {

 public class CpuInfoController: ApiController {

  public void Post(CpuInfoPostData cpuInfo) {
   var context = GlobalHost.ConnectionManager.GetHubContext();
   context.Clients.All.cpuInfoMessage(cpuInfo.MachineName, cpuInfo.Processor, cpuInfo.MemUsage, cpuInfo.TotalMemory);
  }

 }
}
Here we’re getting a reference to our SignalR hub and passing data to the cpuInfoMessage method, which if you’ve been following along, you’ll recognise as the method that the JS is binding to in order to receive data from the SignalR pipe. Thus you can start to see the workflow; a client application posts computer metrics as JSON to a Web Api endpoint, Web Api passes the date on to SignalR, then our UI code handles this message and updates the UI.
The packet of data being sent – CpuInfoPostData – is defined as follows. I placed this inside my Models folder:
 namespace WcfCpuApp.Models {
  public class CpuInfoPostData {
   public string MachineName {
    get;
    set;
   }
   public double Processor {
    get;
    set;
   }
   public ulong MemUsage {
    get;
    set;
   }
   public ulong TotalMemory {
    get;
    set;
   }
  }
 }
This pretty much rounds it off for the server side of things. We now have a server that can accept requests to a Url, write the data to a SignalR pipe and have the interface reflect the changes whenever new information is posted. The application can be tested as it currently stands, by sending a JSON request to the endpoint at https://localhost:44300/api/cpuinfo. I used the excellent Postman to achieve this, but you can use anything that allows you to send arbitrary requests to a url, including Fiddler. You just need to be able to set the content-type header, and the data. You should be able to send the following data packet as a POST request, and have it update the UI:
{
  "machineName":"My PC",
  "processor":45,
  "memUsage":974,
  "totalMemory":89795
}
Obviously the numbers are arbitrary, but it’s only to test that the data is coming through correctly.
Finally, you just need to make sure that a default route is included for the Web Api controller. These are normally defined in /App_Start/RouteConfig.cs, and there should be an entry for the basic /api controller pattern:
using System.Web.Http;
using System.Web.Mvc;
using System.Web.Routing;

namespace WcfCpuApp {
 public class RouteConfig {

  public static void RegisterRoutes(RouteCollection routes) {
   routes.IgnoreRoute("{resource}.axd/{*pathInfo}");

   routes.MapHttpRoute(name: "DefaultApi", routeTemplate: "api/{controller}/{id}", defaults: new {
    id = RouteParameter.Optional
   });

   routes.MapRoute(name: "Default", url: "{controller}/{action}/{id}", defaults: new {
    controller = "Home", action = "Index", id = UrlParameter.Optional
   });
  }

 }
}
The Console Client Project
We shall leave the web side of things for now and have a look at the local client which will send up system resource information to the Web API endpoint that we created in the previous section.
The application we will construct will work like this:
- It opens the service client, ready for sending data
- It creates a worker thread to do the posting without interfering with the main thread, to keep it responsive
- It queries a performance counter to get the CPU usage and current memory usage, and WMI to get the total system memory.
- It sends this data to the Web API endpoint we created earlier, then waits a second before doing it again, until the user hits a key to stop the application.
To start, add a new Console Application project to the solution. I called mine “CpuInfoClient”:

Next, lets start filling out the project. Overall, it’s fairly simple but I’ll go through it step-by-step.
Set up some variables to store our “Is running” flag and some performance counters (you will need to add a using statement for these for System.Diagnostics):
static bool _running = true;
static PerformanceCounter _cpuCounter, _memUsageCounter;
Inside the Main() method, set up a couple of variables for the thread and print a friendly message:
Thread pollingThread = null; // Hello!
Console.WriteLine("CPU Info Client: Reporting your CPU usage today!");
Next, we will dive into a try/catch block and set up performance counters, create the service client and then start the worker thread. To create the performance counters:
try {
 _cpuCounter = new PerformanceCounter();
 _cpuCounter.CategoryName = "Processor";
 _cpuCounter.CounterName = "% Processor Time";
 _cpuCounter.InstanceName = "_Total";
 _memUsageCounter = new PerformanceCounter("Memory", "Available KBytes");
Then start the worker thread:
// Create a new thread to start polling and sending the data
pollingThread = new Thread(new ParameterizedThreadStart(RunPollingThread));

pollingThread.Start();
As we will see, I have created a method called RunPollingThread which will send our data up to the service.
Finally, still within the main() method, I finish off by writing out some friendly messages to the console and then joining the worker thread. If an exception is thrown, I make sure the thread is aborted:
  Console.WriteLine("Press a key to stop and exit");
  Console.ReadKey();
  Console.WriteLine("Stopping thread..");
  _running = false; pollingThread.Join(5000);
} catch (Exception) {
  pollingThread.Abort(); throw;
}
Notice how the _isRunning flag is used. When the user hits a key, the flag is set to “false” and this is the signal to the worker thread to stop doing its thing and exit the thread.
The Worker Thread
The worker thread really just runs in a loop, waiting a second before iterating and sending up local resource data. Here’s the whole method:
static void RunPollingThread(object data) { // Convert the object that was passed in
 DateTime lastPollTime = DateTime.MinValue;
 Console.WriteLine("Started polling..."); // Start the polling loop

 while (_running) { // Poll every second
  if ((DateTime.Now - lastPollTime).TotalMilliseconds >= 1000) {
   double cpuTime;
   ulong memUsage, totalMemory; // Get the stuff we need to send

   GetMetrics(out cpuTime, out memUsage, out totalMemory); // Send the data

   var postData = new {
    MachineName = System.Environment.MachineName, Processor = cpuTime, MemUsage = memUsage, TotalMemory = totalMemory
   };

   var json = JsonConvert.SerializeObject(postData); // Post the data to the server
   var serverUrl = new Uri(ConfigurationManager.AppSettings["ServerUrl"]);
   var client = new WebClient();

   client.Headers.Add("Content-Type", "application/json");
   client.UploadString(serverUrl, json); // Reset the poll time
   lastPollTime = DateTime.Now;
  } else {
   Thread.Sleep(10);
  }
 }
}
Here is where the work is done to actually send the data to the server. I’m using the Newtonsoft Json Serializer from Nuget to do the serialising for me. I simply create a packet of data in the same format that the client is expecting, and send it up there using a WebClient. I’m getting the url to send the data to from appSettings so that it’s easy to change later once the client has been deployed.
Perhaps the more juicy part lies in the GetMetrics() method, where we actually retrieve system resources:
static void GetMetrics(out double processorTime, out ulong memUsage, out ulong totalMemory) {
 processorTime = (double) _cpuCounter.NextValue();
 memUsage = (ulong) _memUsageCounter.NextValue();
 totalMemory = 0; // Get total memory from WMI

 ObjectQuery memQuery = new ObjectQuery("SELECT * FROM CIM_OperatingSystem");
 ManagementObjectSearcher searcher = new ManagementObjectSearcher(memQuery);
 foreach(ManagementObject item in searcher.Get()) {
  totalMemory = (ulong) item["TotalVisibleMemorySize"];
 }
}
The first section of code uses the two performance counters we created earlier to retrieve the values for the current CPU usage, and the current memory usage. Finally, we use WMI to retrieve the available system memory. The units here are in Kilobytes.
Testing it out
So, if the service reference worked and everything compiles, you should now be able to start the website and browse to the home page. Then, start a client instance and see the data come through! Start it on multiple machines and see even more data come through!

And there you have it! The full project source is on Github, so please feel free to download it, fork it, and play around!